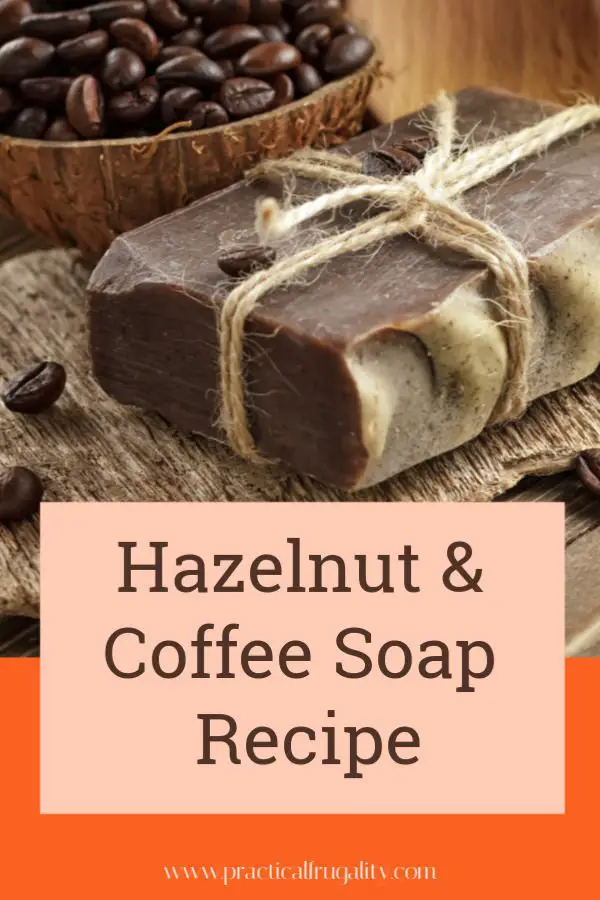
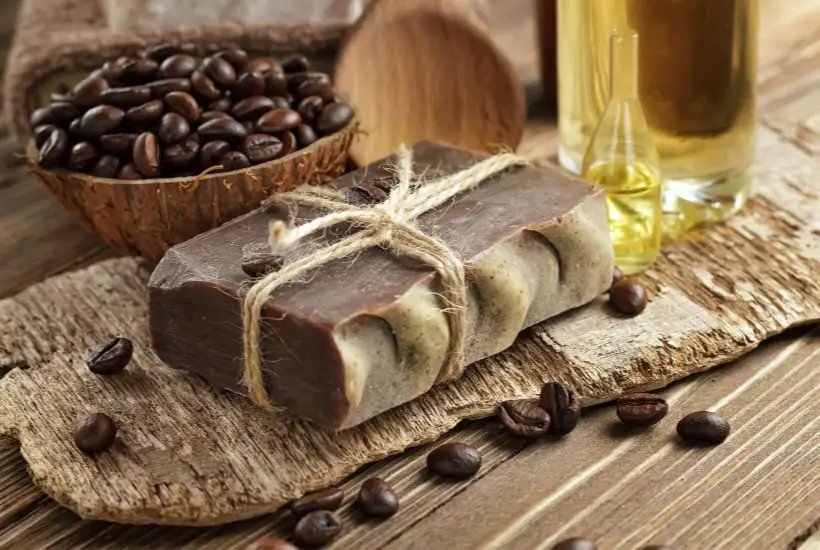
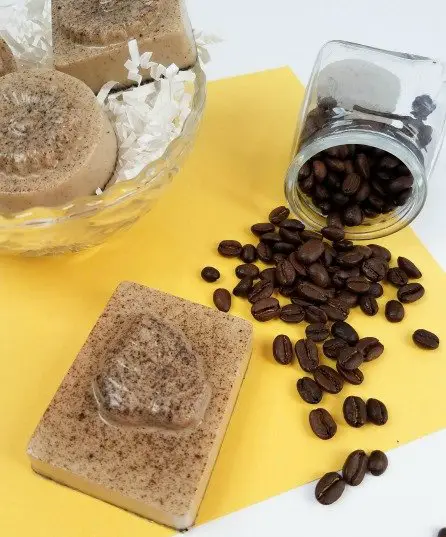
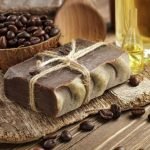
A simple melt and pour shea butter base is used in this homemade hazelnut and coffee soap recipe, so it is perfect for beginners. Great soap for sensitive skin with slightly abrasive properties (if you use real coffee grinds).
Making your own homemade soap has so many benefits, but I especially love that I can choose my own scent and colour combinations.
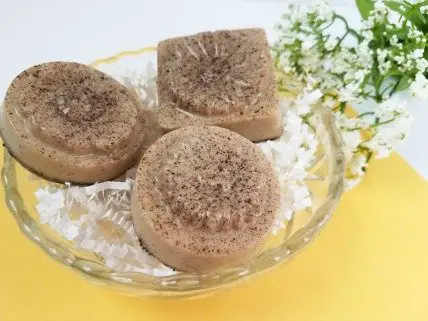
This Hazelnut Coffee Soap Recipe is one of my favourites because it smells absolutely amazing, just like a freshly brewed cup of hazelnut coffee.
A simple melt and pour shea butter base is used in this homemade soap recipe, so it is perfect for beginners, and even those who just want something easy to make.
PIN THIS FOR LATER
MORE DIY SOAPS YOU MIGHT LIKE TO TRY
- Lavender Soap (Easy Recipe) >>
- Oatmeal & Honey Soap (great for sensitive skin) >>
- Coconut & Lime Moisturising Soap >>
The addition of fresh hazelnut coffee grounds and cinnamon bark essential oil combine to give this soap a wonderful scent.
The benefits of using real coffee grinds in this homemade Hazelnut & Coffee Soap
The benefits of having a real coffee grounds in this soap, is not just for the flavour and the look, but the grounds will make your skin nicely smooth as you use this soap.
You can also choose to recycle your used coffee grounds in this soap recipe!
I’ve used hazelnut coffee grounds in this recipe, but if you don’t have this particular flavour, you can use an unflavoured coffee grounds or add hazelnut fragrance instead of cinnamon.
You can pretty much use any kind of flavoured coffee to make this soap, just pick that you have in your kitchen cupboard.
Whichever type of coffee grounds you decide to use, make sure that they are dry. Any water will react with the soap base and you might not get as good set as you’d hoped for.
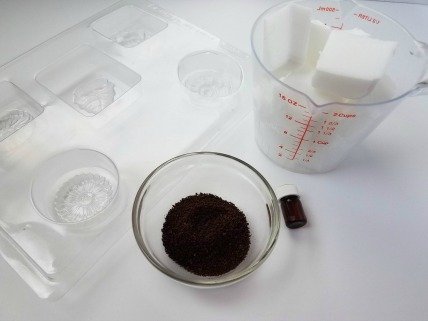
Soap making Equipment
Large measuring cup, glass is best
Spoon or wooden popsicle stick
Soap Mould
Hazelnut &Coffee Soap Ingredients
¾ lb shea butter melt and pour soap base
1 tbsp hazelnut coffee grounds (or just normal coffee grounds) – dry
10 drops cinnamon essential oil (or hazelnut essential oil if using regular coffee grounds and you want the hazelnut smell)
Cut your soap base into 1 inch pieces and place in measuring cup. Microwave for 30 seconds. Stir very well. If not completely melted, repeat at 10 second intervals until fully melted, stirring in between.
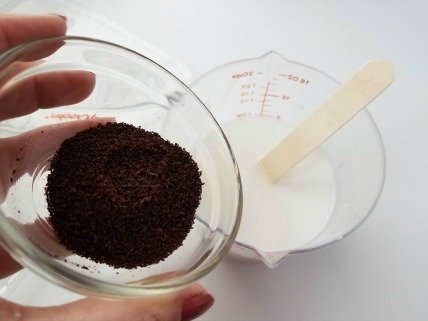
Stir in coffee grounds. Make sure they are evenly distributed to ensure that they set well.
NOTE: Your coffee grounds needs to be dry to prevent growth of bacteria. You also don’t want to have any water element in your soap as this would prevent the soap from setting well.
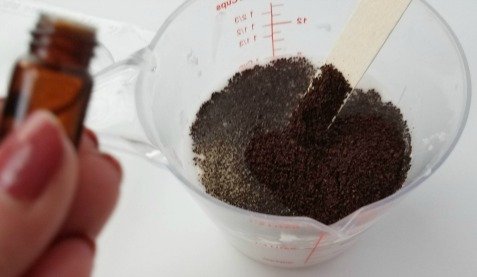
Add essential oil. Stir well. Make sure that the oil is distributed well. Try to smell the soap base and decide for yourself if it needs more essential oil or not.
This is pretty much a personal choice, but don’t be tempted to add to much as the oil might react with your skin – especially if you have a very sensitive skin.
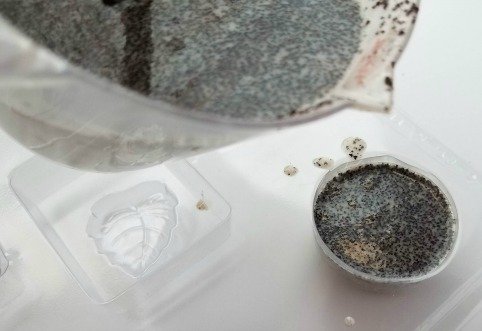
Pour mixture into the soap moulds.
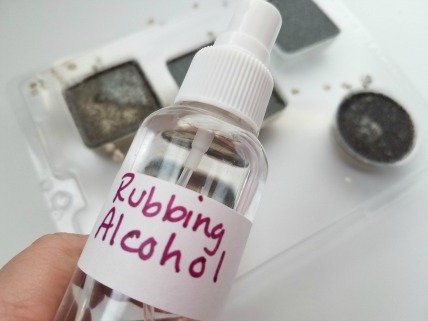
Lightly spray with rubbing alcohol to prevent bubbles from forming on the soap. This is not completely necessary, if you don’thave rubbing alcohol, but as I make quite a few different soap, I already have it in my cupboard.
If you don’t have rubbing alcohol, skip this step and just tap the soap mould several times sharply on the work desk to get rid of any visible air bubbles on the top of your soap.
Little air bubbles are not a problem, but if you have too many, they could make your soap weaker (because they are essentially just air) and it might not be as firm as you need it for washing and general use.
Let set for about 60 minutes in a room temperature and remove from mould. Don’t place the soap into cold room or close to anything that’s too warm, as this would prevent it from setting well.
If your soap is not set within 60 minutes, leave the soap for a little longer, until it comes from the mould itself – don’t force it, otherwise you might break your mould.
How to store your homemade soap
- Wrap each bar tightly in plastic wrap or wax paper to protect it from air exposure. This prevents the bars from sweating or getting soggy.
- Place the wrapped bars in an airtight container like a plastic tub or cardboard box. Glass jars also work well for storage. The airtight container prevents outside moisture and contaminants from getting in.
- Store in a cool, dry place away from excess heat or humidity. A linen or bathroom cabinet works well. Avoid warm, damp places like the shower.
- Keeping the soap out of direct sunlight will help preserve the colors and scents. Sunlight can accelerate deterioration.
- If storing for more than a year, consider adding a preservative like rosemary oleoresin or vitamin E oil when making the soap to help extend shelf life.
- Write the production date on each batch you make and use the oldest soap first when possible.
- If any soap shows signs of drying, weeping oils, smelling bad, or discoloring, it has expired and should be discarded.
- Properly stored, homemade melt and pour soap with shea butter can last 1-2 years when kept wrapped in an airtight container in a cool, dark place.
what can I use if I don’t have a mould for a handmade pour soap?
- Shoeboxes – Cardboard shoeboxes make great simple molds for bars of soap. Line them with plastic wrap or freezer paper before pouring in your soap
- Milk cartons – Thoroughly cleaned milk and juice cartons can be used as molds. Cut off the top and wash well before using
- Muffin tins – Standard muffin tins work perfectly to make round bars of soap
- Pringles cans – The iconic Pringles potato chips can is a soapmaker’s friend, creating long bars
- Yogurt containers – Save and clean your used yogurt tubs and they will make great small molds
How long does homemade melt and pour shea butter coffee base soap last?
Homemade melt and pour soap made with a shea butter base can generally last 1-2 years when properly stored.
- The shelf life of a melt and pour soap is affected by the quality of the ingredients and how it is stored. A soap with more natural ingredients like shea butter may have a shorter shelf life of 1 year.
- Properly storing the soap in an airtight container in a cool, dry place away from excess moisture and heat can help extend its shelf life to 2 years or longer.
- High amounts of shea butter, olive oil, or other natural oils can go rancid over time, shortening shelf life. Using a preservative can help prolong freshness.
- The soap won’t ever go “bad” or be unsafe to use after expiration, but it may lose its scent and become discolored or dried out, losing quality.
- Signs your melt and pour soap has expired are drying out, weird smell, color changes, and oil leaking. If it shows no signs of deterioration, it can be safely used beyond 2 years.
- Handmade soaps generally have a shorter shelf life compared to commercially made melt and pour bases, lasting 1-2 years rather than 2-3 years.
Posts may contain affiliate links. If you purchase a product through an affiliate link, your costs will be the same but Practical Frugality will receive a small commission. This helps cover some of the costs of running this site. We appreciate your support!
Stay in touch
Hope this post inspires you and of course, I’d love to know what you think! Let me know in the comments below or find me on Instagram, Facebook or Twitter and add the hashtag #practicalfrugality so that I can see your post.
Or why not subscribe to my weekly newsletter with frugal living tips and recipes straight to your mailbox.
Magdalena
Hazelnut & Coffee Soap Recipe
Equipment
- Large measuring cup, glass is best
- Spoon or wooden popsicle stick
- Soap Mould
Materials
- ¾ lb shea butter melt and pour soap base
- 1 tbsp hazelnut coffee grounds or just normal coffee grounds
- 10 drops cinnamon essential oil or hazelnut essential oil (if using regular coffee grounds)
Instructions
- Cut soap base into 1 inch pieces and place in measuring cup.
- Microwave for 30 seconds. Stir very well. If not completely melted, repeat at 10 second intervals until fully melted, stirring in between.
- Stir in coffee grounds
- Add essential oil. Stir well.
- Pour mixture into the soap moulds.
- Lightly spray with rubbing alcohol to prevent bubbles from forming on the soap.
- Let set for about 60 minutes and remove from mould.
This blog post was originally written on 2 May 2019 and last updated on 3 February 2024

Leave a Reply