Autumn is always a happy season since it’s harvest time and there is so much colour in the countryside.
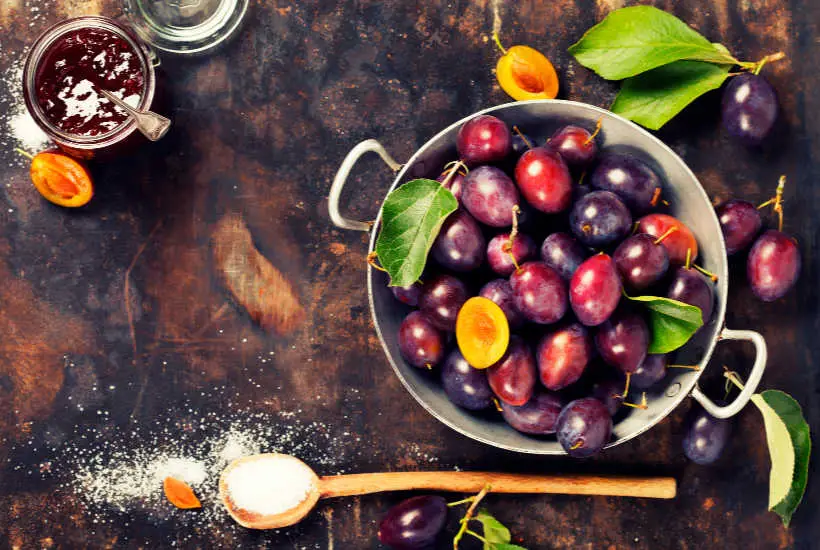
There is also plenty of fruit around and one of my favourite things is to make a plum jam.
So, today I wanted to share with you my easy plum jam recipe, which I’ve tried and tested over the years.
MORE AUTUMN INSPIRED RECIPES
Jam making equipment
- preserving pan (if you have it) or a large saucepan
- jam thermometer
- small plates (kept in the fridge)
- 3-4 sterilised jam jars
Ingredients
Plums
If you can pick your own plums from a local farm or forage for plums in the countryside, you’ll be awarded by very flavoursome jam.
You can, of course, use shop-bought plums, but I would always go and buy them from a local stall or farm, rather than the supermarket.
This is because you really want to have as much flavour as possible in your fruit and unripened fruit might result in fairly bland plum jam.
Sugar
White cane or beat sugar is best for this recipe as it allows the flavour of the plums to come through.
If you want to change the flavour a little, you can also swap some of the sugar for dark or brown sugar to add more caramelised flavour to your plum jam.
The darker sugars are excellent choice if you want to make deep, rich plum jam with some spices and whisky or rum for the festive season.
butter
Butter helps to disperse the foam on the top of the jam, just before you pour it into your jam jars. You only need a little bit, but if you don’t want to use butter, leave it out.
You can also gently scoop out the foam with a slotted spoon or something similar, if you don’t want to have it on the top of your jam.
Optional Ingredients (for extra or different flavour)
This is really easy plum jam recipe, but if you wanted to add some extra flair to it, here is what you can do.
If you find the flavour of your jam too sweet and one dimensional (which sometimes fruit with just sugar can be) add juice from 1/2 lemon (or as little or as much as you like). This will add wonderful sharpness to the flavour.
If you are thinking of making these for a special occasion (and I definitely applaud you for that…) add a bit of alcohol just before you pot the jam.
2-3 tablespoons of sloe gin, brandy or whisky would compliment the flavour of the plum jam perfectly. The alcohol mostly evaporates as you pour it in (…what a shame…I know!), but the flavour will stay.
You can also add raisins (soaked in gin – optional), walnuts, cinnamon, vanilla or any other warming spice. Always add the flavouring right at the end.

How to make plum jam recipe at home
Clean the fruit and remove the stones. You can slightly crush the stones and put them to a muslin bag to add to the jam as you are making it.
The plum kernels and stone help with the jam flavour and also contain pectin. Just make sure you remove the bag from the jam before potting
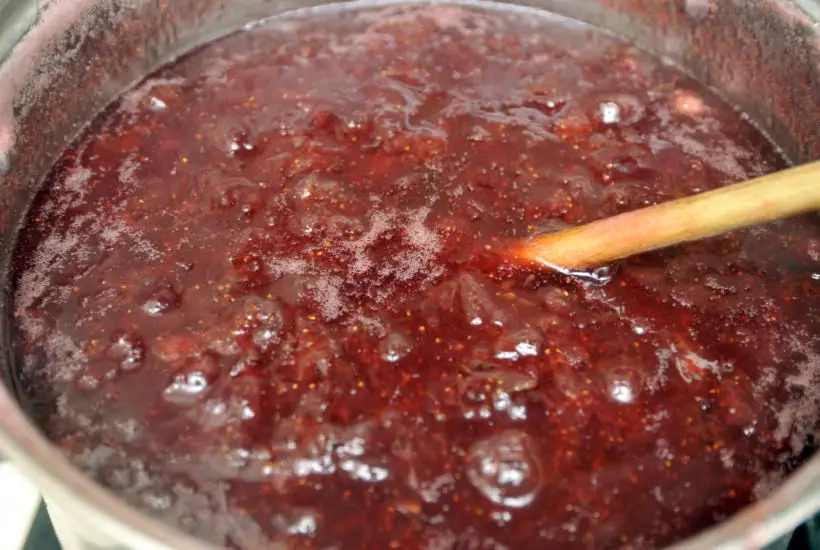
First of all put all the fruit in a preserving pan (or pan large enough to handle about 2-3 ltr of volume), add 350 ml of water, cover with a lid and simmer over low to medium heat until the fruit becomes soft. This can take about 20 minutes
Remove the lid and increase the heat and boil for about 10-15 minutes or until the volume has reduced by about 2/3. At this stage the plum jam might start sticking, so gently stir the mixture to prevent this.
Now add the sugar and plum kernels (if using) and heat gently to dissolve the sugar. Add the butter and bring to boil.
Keep the jam as a ‘rolling boil’ for 10-15 minutes, stirring occasionally. If you are using jam thermometer (you don’t need to have one, but it’s sometimes helpful) the temperature should reach about 105 C.
Take the pan off the heat.
To make sure that your plum jam is done do the ‘cold saucer test’. Before you start your jam making put at least 2 small plates to fridge. When you are ready to test the jam, take one plate out pour a little of the jam on the plate and put back to fridge.
If in 5 minutes, the jam is wrinkling as you are pushing it with your finger, then you know the rest of the jam will set too. If the jam didn’t set, just put the pan back on to the stove and boil for another 5 minutes. Test again.
If you, like me, sometimes forget to put enough plates to the fridge, just quickly stick one to freezer before you do the test.Leave the jam to cool a little and then pot.
My favourite tips on making plum jam recipes
Do you peel plums when making jam?
Yes, it’s best to peel your plums before you use them. The plum skin could be a little tough in the jam as it can’t be properly softened.
How do you get the skins off plums?
Peeling plums or damsons would be quite a fiddly job. The best way to peel plums is to cut an X sign in the bottom of each plum with a sharp knife and boil them for about 1 minute.
Make sure you boil the water first before you add the plums in. Then, using a slotted spoon, place them in a very cold water (get some ice from a freezer for this) and leave them for few minutes.
You’ll be able to see how the top skin is starting to peel off by itself and then you can just use a sharp knife to peel it off.
Are plums high in pectin?
Plums, damsons or Victoria plums are naturally high in pectin, which means that they set very nicely without the use of commercial pectin.
They are perfect fruits to start if you are a complete newbie to jam making.
How to thicken plum jam?
If your plum jam doesn’t look like it’s going to set – e.i. you have already done your ‘cold plate’ test, just return it back to medium heat and boil for another 5 minutes.
Test again and I’m sure you’ll find the jam has thicken a little. If you are happy with the consistency, pot your jam, if not repeat the steps again.
Why do you have to add lemon juice to plum jam?
The lemon juice helps the plum jam to set (it binds the pectin in the fruit), but it also helps with flavour.
Depending on your plum or damson fruits, you might find them a little bland on their own and I find that the lemon helps with the flavour.
What sort of pan do I need to use for my plum jam?
Make sure you use large enough saucepan to make your plum jam. Preserving pan is best, but if you don’t have one, use the biggest saucepan or large pot you have.
Preserving pans have slightly tapered edge (it sort of goes inwards), which prevents the jam from overboiling and causing sticky mess on your cooker.
The tall, straight sides of any saucepan just lead the rolling boil to the top and over it, if you don’t stir it very gently.
If you don’t make jams often, it’s probably not necessary to buy your own preserving pan (you can always borrow one from your family), just make sure you watch your jam as it boils to prevent any going over!
Can I make plum jam without sugar?
Don’t skip the sugar!
As much as you might be tempted to add less sugar, because you might like to have slightly less sugary jam, the sugar is important ingredients. It helps to preserve the jam and it also helps to thicken the plum jam.
If you add in too little sugar, your plum jam might ferment when you pot it up and if you add to much, it might cause sugar crystallisation. None of those things are very good, so stick to the recipe!
It’s also a good idea to make sure that your plums are soft and properly cooked through before you add sugar.
After you add the sugar, the fruit can’t get any softer, so it will stay in the softness/structure it was in, when you added the sugar.
Before you boil the jam, make sure that the sugar is properly dissolved to avoid any sugar crystallisation afterwards.
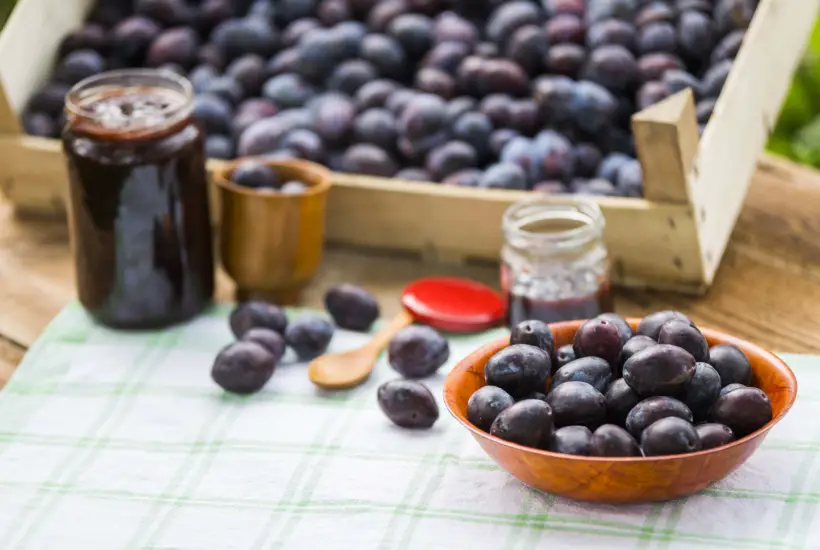
What can I use to pot my plum jam?
You can use any glass jam jars with lids that can be tightly sealed. If you are planning to use your plum jam straightaway, you can always use spare ramekins or earthenware containers.
Make sure that your jam jars are perfectly clean and sterilised. The best way to do this is to wash them as normally and place them on the tray in the low heat oven – about 100C, until your plum jam is ready to be potted.
So, here you are my favourite easy plum jam recipe, which I make every single year. The plum jam officially ment to last good 12 months, but in our household never does…
Stay in touch
Hope this blog post inspires you to make this recipe and if you do, I’d love to what you think! Let me know in the comments below or find me on Instagram, Facebook or Twitter and add the hashtag #practicalfrugality so that I can see your post.
Or why not subscribe to my weekly newsletter with frugal living tips and recipes straight to your mailbox.
Magdalena
Plum Jam Recipe
Equipment
- preserving pan (if you have it) or a large saucepan
- jam thermometer
- small plates (kept in the fridge)
- 3-4 sterilised jam jars
Ingredients
- 1 kg plums
- 1 kg sugar
- 1 tbsp butter
Instructions
- Clean the fruit and remove the stones. You can slightly crush the stones and put them to a muslin bag to add to the jam as you are making it. The plum kernels and stone help with the jam flavour and also contain pectin. Just make sure you remove the bag from the jam before potting
- First of all put all the fruit in a preserving pan (or pan large enough to handle about 2-3 ltr of volume), add 350 ml of water, cover with a lid and simmer over low to medium heat until the fruit becomes soft. This can take about 20 minutes
- Remove the lid and increase the heat and boil for about 10-15 minutes or until the volume has reduced by about 2/3. At this stage the plum jam might start sticking, so gently stir the mixture to prevent this.
- Now add the sugar and plum kernels (if using) and heat gently to dissolve the sugar. Add the butter and bring to boil. Keep the jam as a 'rolling boil' for 10-15 minutes, stirring occasionally. If you are using jam thermometer (you don't need to have one, but it's sometimes helpful) the temperature should reach about 105 C.
- Take the pan off the heat.
- To make sure that your plum jam is done do the 'cold saucer test'. Before you start your jam making put at least 2 small plates to fridge. When you are ready to test the jam, take one plate out pour a little of the jam on the plate and put back to fridge. If in 5 minutes, the jam is wrinkling as you are pushing it with your finger, then you know the rest of the jam will set too. If the jam didn't set, just put the pan back on to the stove and boil for another 5 minutes. Test again.
- If you, like me, sometimes forget to put enough plates to the fridge, just quickly stick one to freezer before you do the test.Leave the jam to cool a little and then pot.

Leave a Reply