These diy glitter bath bombs are great as a Christmas Gift or a perfect treat for a good night in! Easy to make, they sparkle as they disappear into your bath water. If you are new to bath bomb making, make sure you check out my simple guide to bath bomb making for beginners and review of my favourite bath bomb moulds.
GLITTER BATH BOMBS RECIPE
It’s all about the colour with this glitter bath bomb project, but if you like you can add a light fragrance, such as rose, lavender or lemon. Pretty much any fragrance will work with this recipe, so just use whatever you have already at home.
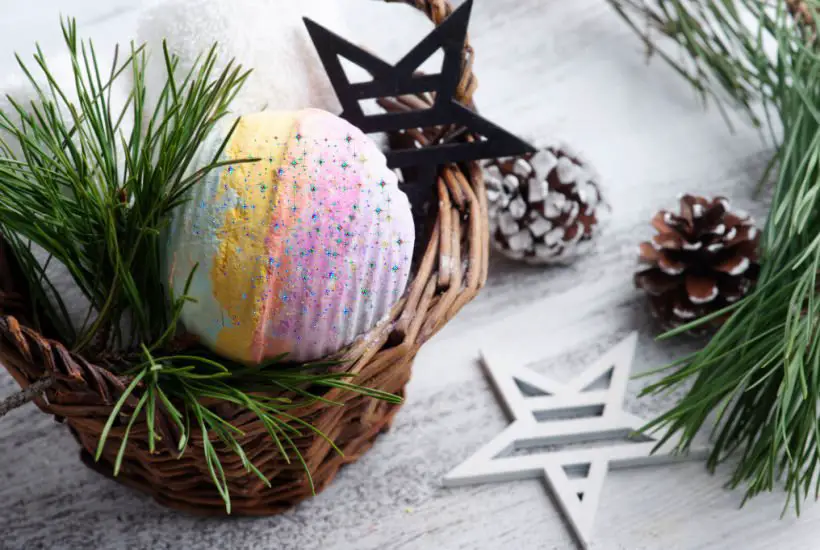
You can choose any colour you like, but the pink, yellow and white is great to use with silver or pink glitter. Again, don’t feel that you need to use two different types of glitter, just use one or whatever glitter you have at hand.
EQUIPMENT
- Stainless steel bath bomb moulds – traditional round ones work great, but you can also try to use heart shapes for Valentine’s day or star-shaped for Christmas
- Spray bottle filled with rubbing alcohol (this helps to release the bomb from the mould)
- 1 large mixing bowl
- 2-3 small bowls to divide your colours
MATERIALS & INGREDIENTS
- 2 cups baking soda
- 1 cup citric acid
- 1/4 cup cornstarch
- 1/3 cup coconut oil
- 1 tablespoon polysorbate 80
- Rose essential oil (or any other of your choice)
- Pink mica powder (or other colours of your choice)
- Silver mica powder(or other colours of your choice)
- Pink cosmetic glitter (or other colours of your choice)
- Silver cosmetic glitter (or other colours of your choice)
- Yellow mica powder
- Yellow cosmetic glitter
INSTRUCTIONS
- In a large mixing bowl, add the baking soda, citric acid, and cornstarch.
- Whisk dry ingredients together.
- Add essential oils
- Add the coconut oil. This binds all the ingredients together, so you bath bombs don’t crumble when you touch them!
- Add the polysorbate 80. This helps the coconut oil disperse more evenly in your bath water, makes the bath bombs bubbly and prevents the mica from sticking to the side of the tub.
- Mix the ingredients together. I use my hands to break down any lumps and make sure everything is really mixed in there. The mixture is perfect when it holds together when you press it into your hands and feels like wet sand.
- Separate mixture into the two bowls.
- Add 1 tablespoon of the pink mica and pink cosmetic glitter into one of the small bowls and the silver mica and silver cosmetic glitter into the other small bowl. You can also use yellow colour and yellow mica glitter to add a third colour.
- Mix colors into mixture thoroughly. Add a bit more color if the mixture is too light. Continue to add a bit and mix until you get the color you want.
- Add about 1 tablespoon of your first color into a cavity of one side of the mold.
- Do the same with the other color and continue until the mold is full.
- Press both sides of the mold together firmly, grinding together to get rid of the excess mixture.
- Tap both sides of the mold and gently release the bomb.
- Allow to dry a minimum of 24 hours. If your climate is wet or cold, allow an additional 24 hours. My rule of thumb is that when it is hard to the touch, they are ready for the tub!
- Store in an airtight container until ready for use.
What glitter can I use in bath bombs?
Always use a glitter specifically designed to be used in cosmetics for soap making, shower gels or bath bombs and always make sure it’s labeled as ‘non-toxic’.
Never use a glitter that is used for crafting, painting or paper making as this glitter can be toxic and usually doesn’t dissolve in water. You really don’t want to be adding plastic glitter to the ocean!
Can you use edible glitter in bath bombs?
Yes, you can! Edible glitter is perfectly fine to be used in cosmetics and bath bombs making as if it’s good enough to eat it will be fine to have a bath in! The only thing you might like to consider here is the cost as edible glitter can be more expensive than specialist bath bomb making.
If you still want to use edible glitter or gold flakes, leave them out of the recipe and only add them to an outer layer of your bath bomb. This way, your bath bomb will still look like it has a glitter in, but you’ll use much less (and save money at the same time).
More bath bombs recipes
Stay in touch
Hope this post inspires you to make your own natural cosmetics and if you do, I’d love to what you think! Let me know in the comments below or find me on Instagram, Facebook or Twitter and add the hashtag #practicalfrugality so that I can see your post.
Or why not subscribe to my weekly newsletter with frugal living tips and recipes straight to your mailbox.
Magdalena

Glitter Bath Bombs Recipe
Equipment
- Stainless steel bath bomb molds
- Spray bottle filled with rubbing alcohol
- 1 large mixing bowl
- small bowls
Materials & Ingredients
- 2 cups baking soda
- 1 cup citric acid
- 1/4 cup cornstarch
- 1/3 cup coconut oil
- 1 tablespoon polysorbate 80
- Rose essential oil
- Pink mica powder
- Silver mica powder
- Pink cosmetic glitter
- Silver cosmetic glitter
Instructions
- In a large mixing bowl, add the baking soda, citric acid, and cornstarch.
- Whisk dry ingredients together.
- Add essential oils
- Add the coconut oil. This binds all the ingredients together, so you bath bombs don’t crumble when you touch them!
- Add the polysorbate 80. This helps the coconut oil disperse more evenly in your bath water, makes the bath bombs bubbly and prevents the mica from sticking to the side of the tub.
- Mix the ingredients together. I use my hands to break down any lumps and make sure everything is really mixed in there. The mixture is perfect when it holds together when you press it into your hands and feels like wet sand.
- Separate mixture into the two bowls.
- Add 1 tablespoon of the pink mica and pink cosmetic glitter into one of the small bowls and the silver mica and silver cosmetic glitter into the other small bowl.
- Mix colors into mixture thoroughly. Add a bit more color if the mixture is too light. Continue to add a bit and mix until you get the color you want.
- Add about 1 tablespoon of your first color into a cavity of one side of the mold.
- Do the same with the other color and continue until the mold is full.
- Press both sides of the mold together firmly, grinding together to get rid of the excess mixture.
- Tap both sides of the mold and gently release the bomb.
- Allow to dry a minimum of 24 hours. If your climate is wet or cold, allow an additional 24 hours. My rule of thumb is that when it is hard to the touch, they are ready for the tub!
- Store in an airtight container until ready for use.

Leave a Reply